Back to Safety Center Main Menu
Static Reports and Forms - Advanced Customization
The Static Reports and Forms Reporting feature allows you to create forms that your end users can fill out and submit from the CrisisManager mobile app for a specific event. For information on how to use templates to quickly get up and running with a standard form, see the Static Reports and Forms page. Use the tools below to either create your own form from scratch, or customize a template.
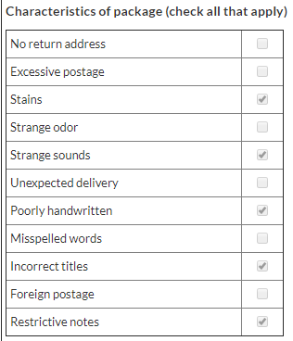
Adding Checkboxes
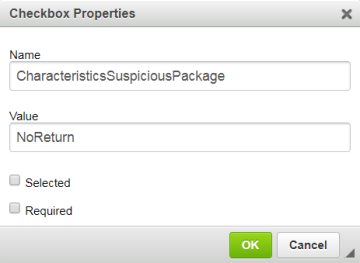
- Click on the checkbox icon (
 ) and a Checkbox Properties window will appear.
 - Enter a Name for the checkbox. This is not the text that will appear next to the checkbox, but is a way of grouping multiple checkboxes together. The Name needs to be the same for all checkboxes within a checklist. *Note: There should be no spaces between characters in the Name.
-
Enter a Value for the checkbox. The Value is identifying what this individual checkbox correlates to. *Note: There should be no spaces between characters in the Value.
- Click OK.
|
|
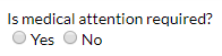
Adding Radio Buttons
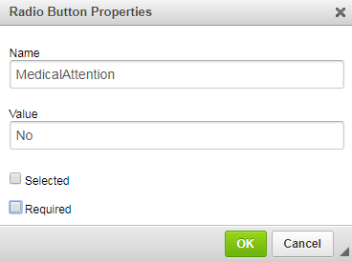
- Click on the radio button icon (
 ) and a Radio Button Properties window will appear.
 - Enter a Name for the radio button. This is not the text that will appear next to the radio button, but is a way of grouping multiple radio buttons together. The Name needs to be the same for all radio buttons within a grouped list. *Note: There should be no spaces between characters in the Name.
- Enter a Value for the radio button. The Value is identifying what this individual radio button correlates to. *Note: There should be no spaces between characters in the Value.
- Click OK.
|
|
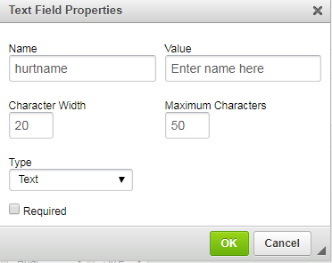
Adding Text Fields
- Click on the text field icon (
 ) and a Text Field Properties window will appear.
 - Enter the Name of the text field. *Note: There should be no spaces between characters in the Name.
- Enter the Value. This is what shows in the text field before the user types a response.
- Type in the Character Width. This will determine the width of the text field.
- Set the Maximum Characters allowed for the Text Field.
- The Type of the text field is set to text by default. This allows the user to freely type anything in the text field. You can select a different type such as Email or Telephone Number to require the user to type their response in one of those formats. For example, if Email is selected, the user must type their response as name@domain.com.
- Click OK.
|
|
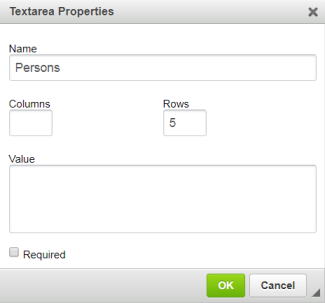
Adding Textareas
- Click on the textarea icon (
 ) and a Textarea Properties window will appear.
 - Enter the Name of the textarea field. *Note: There should be no spaces between characters in the Name.
- Type a number in the Rows field. The rows determine how many lines of text the textarea field will show at one time.
- Enter the Value. This is what shows in the text field before the user types a response.
- Click OK.
|
|
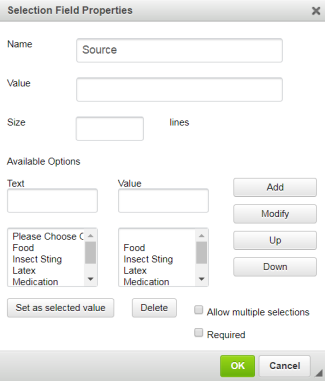
Adding Selection Fields
- Click on the selection field icon (
 ) and a Selection Field Properties window will appear.
 - Enter a Name for the selection field. *Note: There should be no spaces between characters in the Name.
- For each of the Available Options enter the Text you would like to appear and a corresponding Value.
- If you would like a default text to show such as "Please select an option," enter that in the Text field and leave the value field blank.
- Select the text you would like as the default selection by clicking the Set as selected value button.
- Click OK.
|

|
